

This little journal isn’t exactly practical. It probably isn’t very sensible either. It’s also lopsided from some angles and each time I make a new one, it’s never quite the same as the last.
But everything about it makes me smile — the cloud-shaped pages, the blue on blue on blue, and the lovely little bow right in the middle. It’s good for sky’s-the-limit brainstorming and head-in-the-clouds musings. It’s also suitable for noting gratitude, good things, and madcap adventures. (I’ve even done a little something with it that you might not expect. I’ll show you in just a moment.)
If you’d like to make your own cloud journal, I’ve whipped up a quick printable and tutorial for you — for moments when you’re feeling a little impractical or un-sensible and a regular rectangular journal just won’t do.
To begin, you’ll find my mini cloud journal template right here or by clicking on the image above or below. (The file includes two page sizes. The first page is letter sized. The second page is A4.)
You’ll also need extra paper to make your cloud pages, a pencil, scissors, something pointy for poking holes (I forgot to include my little sewing awl in the image below, but you’ll see it further down), a sewing needle, and about a 6-8 inch length of thread (I used embroidery floss).

Start by cutting out the cloud templates (image below, left) and tracing them onto your selected cloud paper. I cut out one of the largest clouds and two of each of the remaining clouds (image below, right).


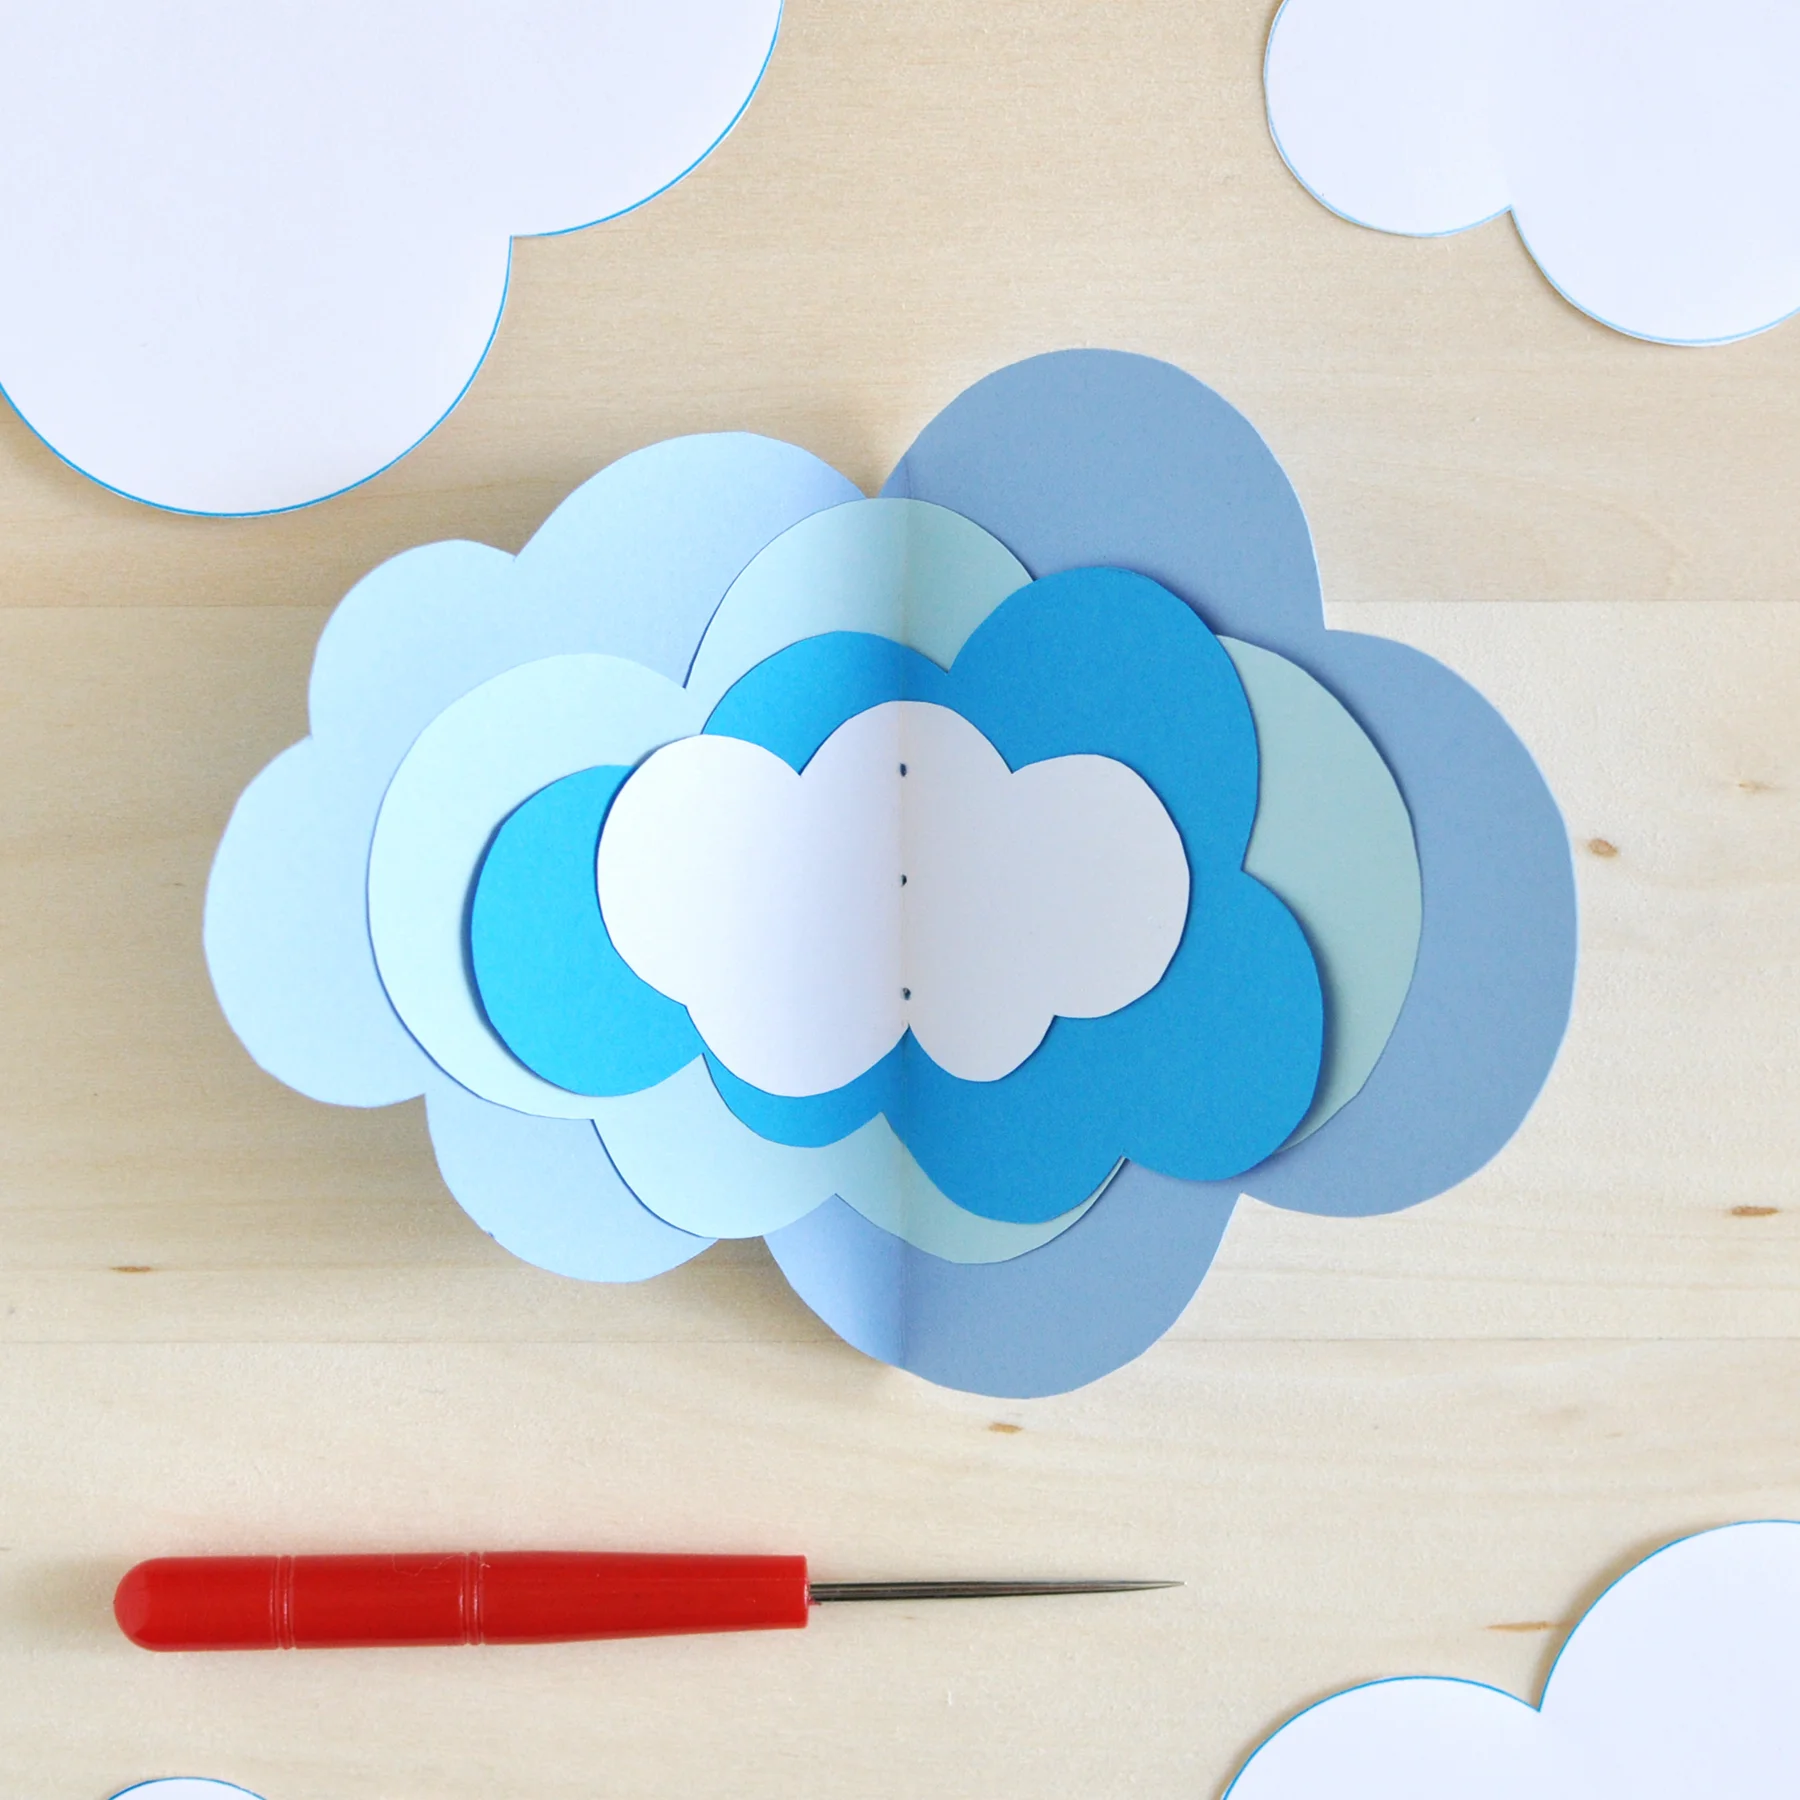
Here’s the unexpected part. After folding each cloud in half individually — I just eyeballed the halfway point and went for it — I arranged the clouds from largest to smallest on the inside of the journal (image below, left), then did the same on the outside (image below, right), so that the largest cloud is the fourth cloud in a stack of seven. This way, there are tiny clouds on the inside and outside of the journal.


Now it’s time to poke the holes and sew the journal together. The red handled item pictured below is the awl I used to make the holes. Again, I estimated a nice middle spot and poked the first hole, then one more above and below (image below, top left).
To sew the binding:
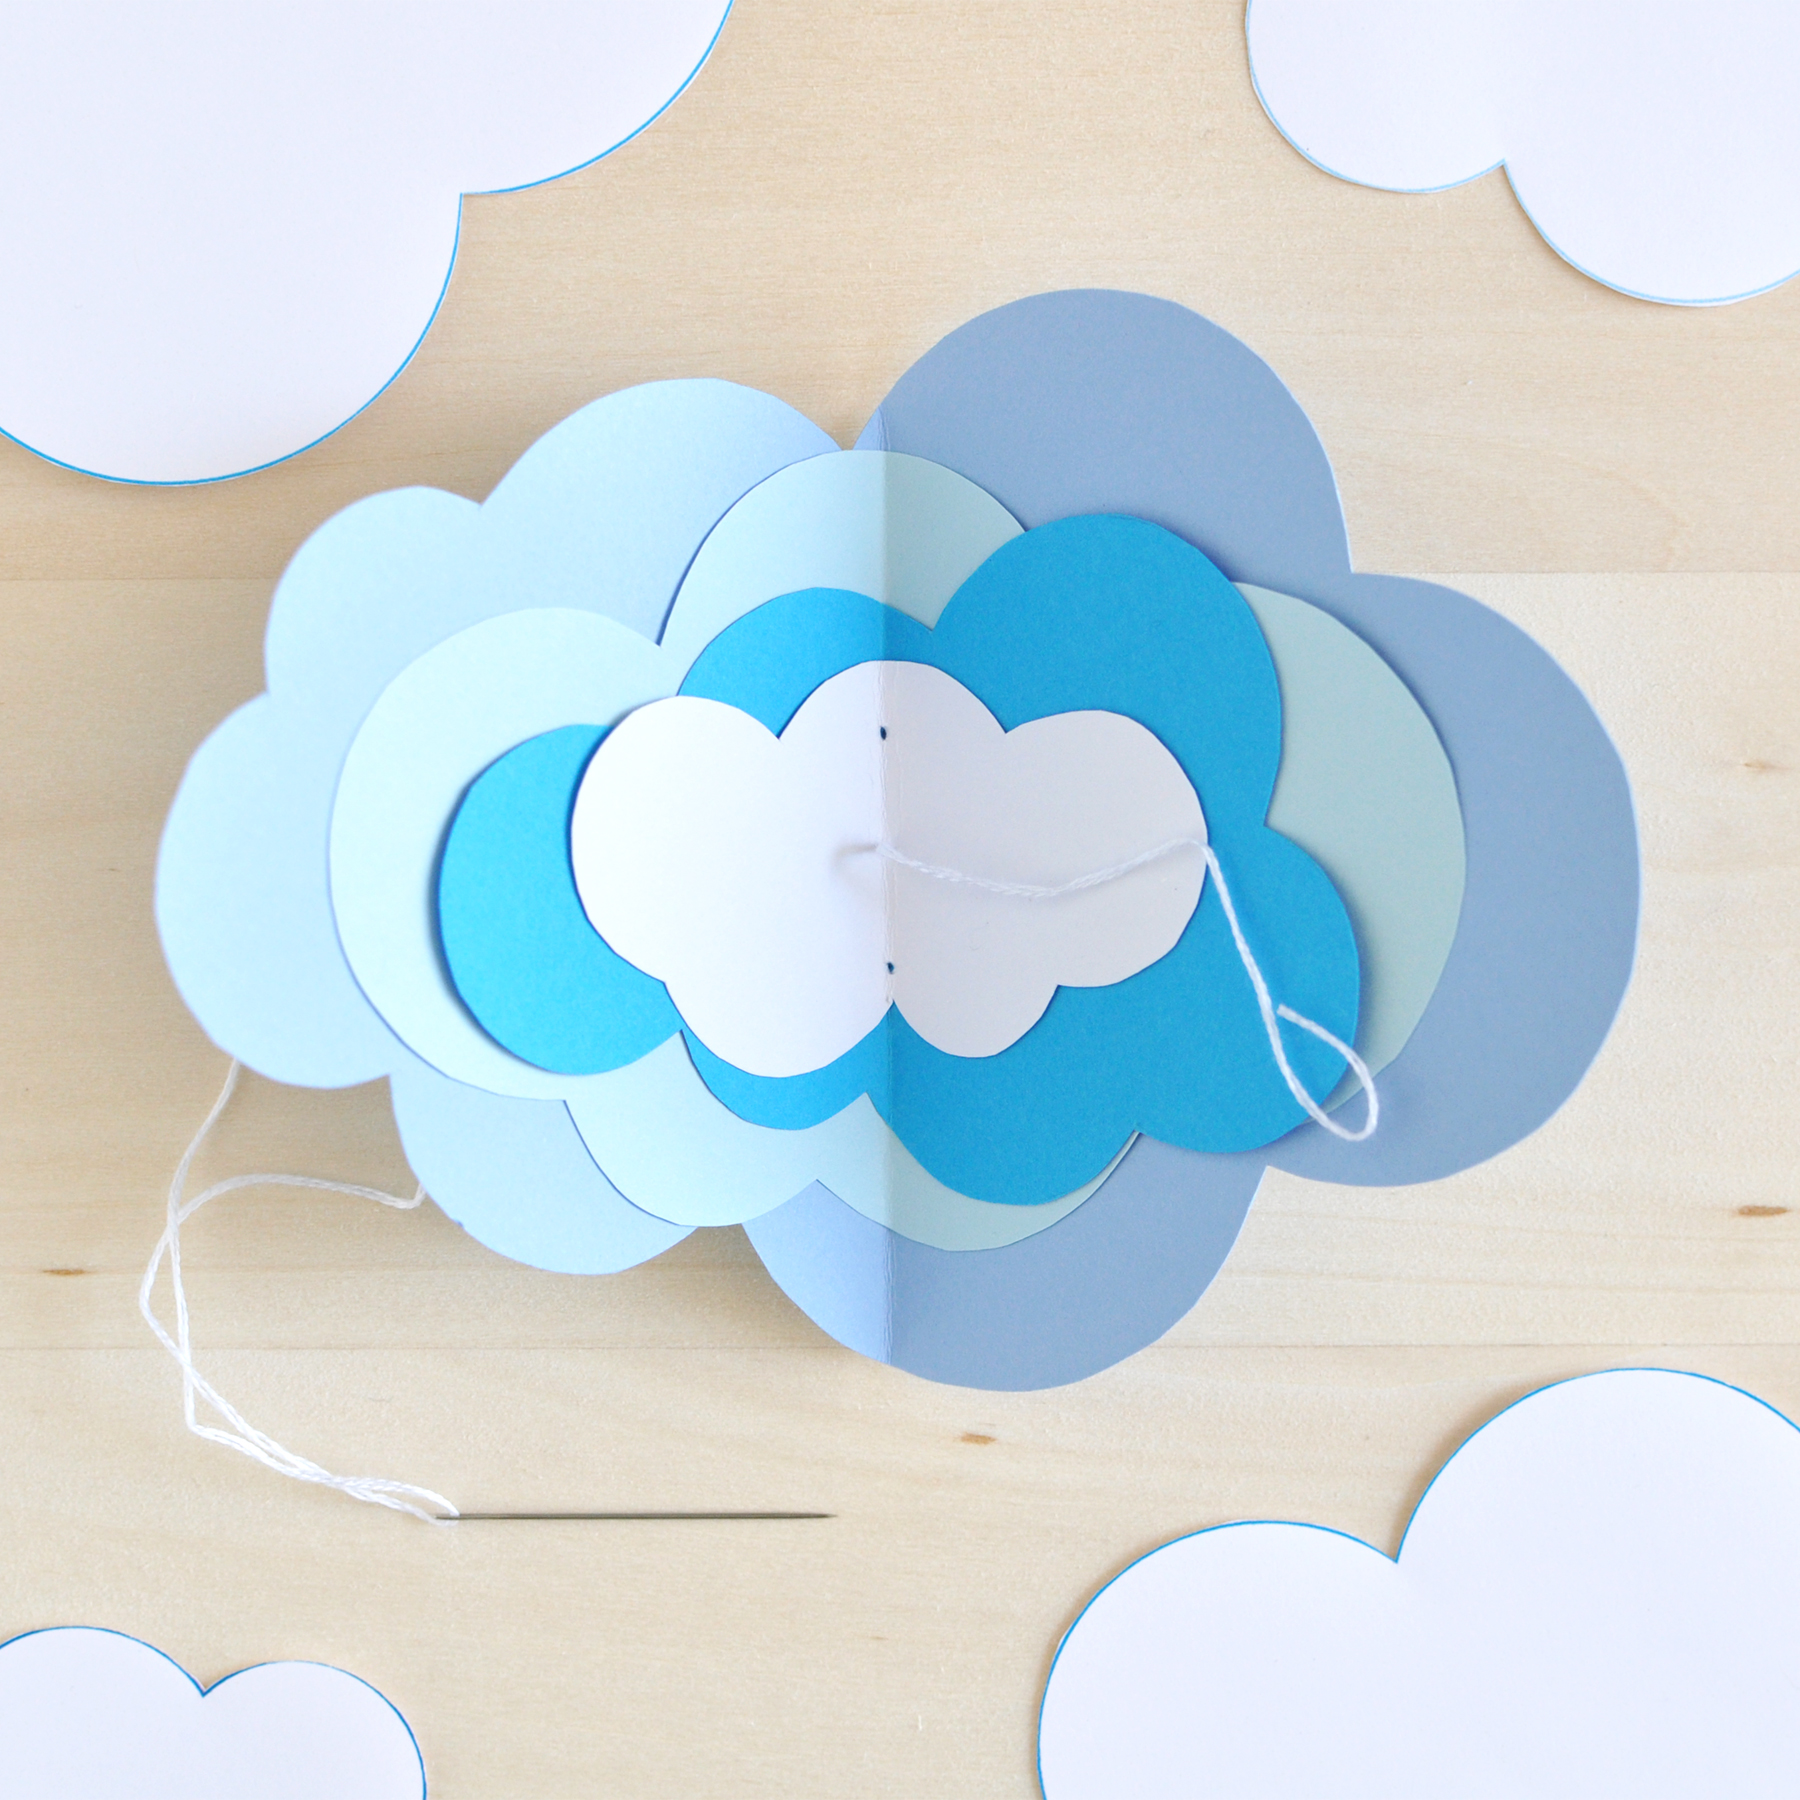
Holding the journal open in front of you, pass your needle and thread through the front middle hole, leaving a tail that you’ll later use to tie a small knot and bow. (image below, top right).
From the back of the journal, pass the needle through the top hole to the front of the journal and then down, through the bottom hole, to the back of the journal. Make sure your tail is to one side of the long stitch you’ve just made (image below, bottom left).
From the back, pass your needle back through the middle hole, this time coming through the front on the side of your long stitch opposite to the tail (image below, bottom right).
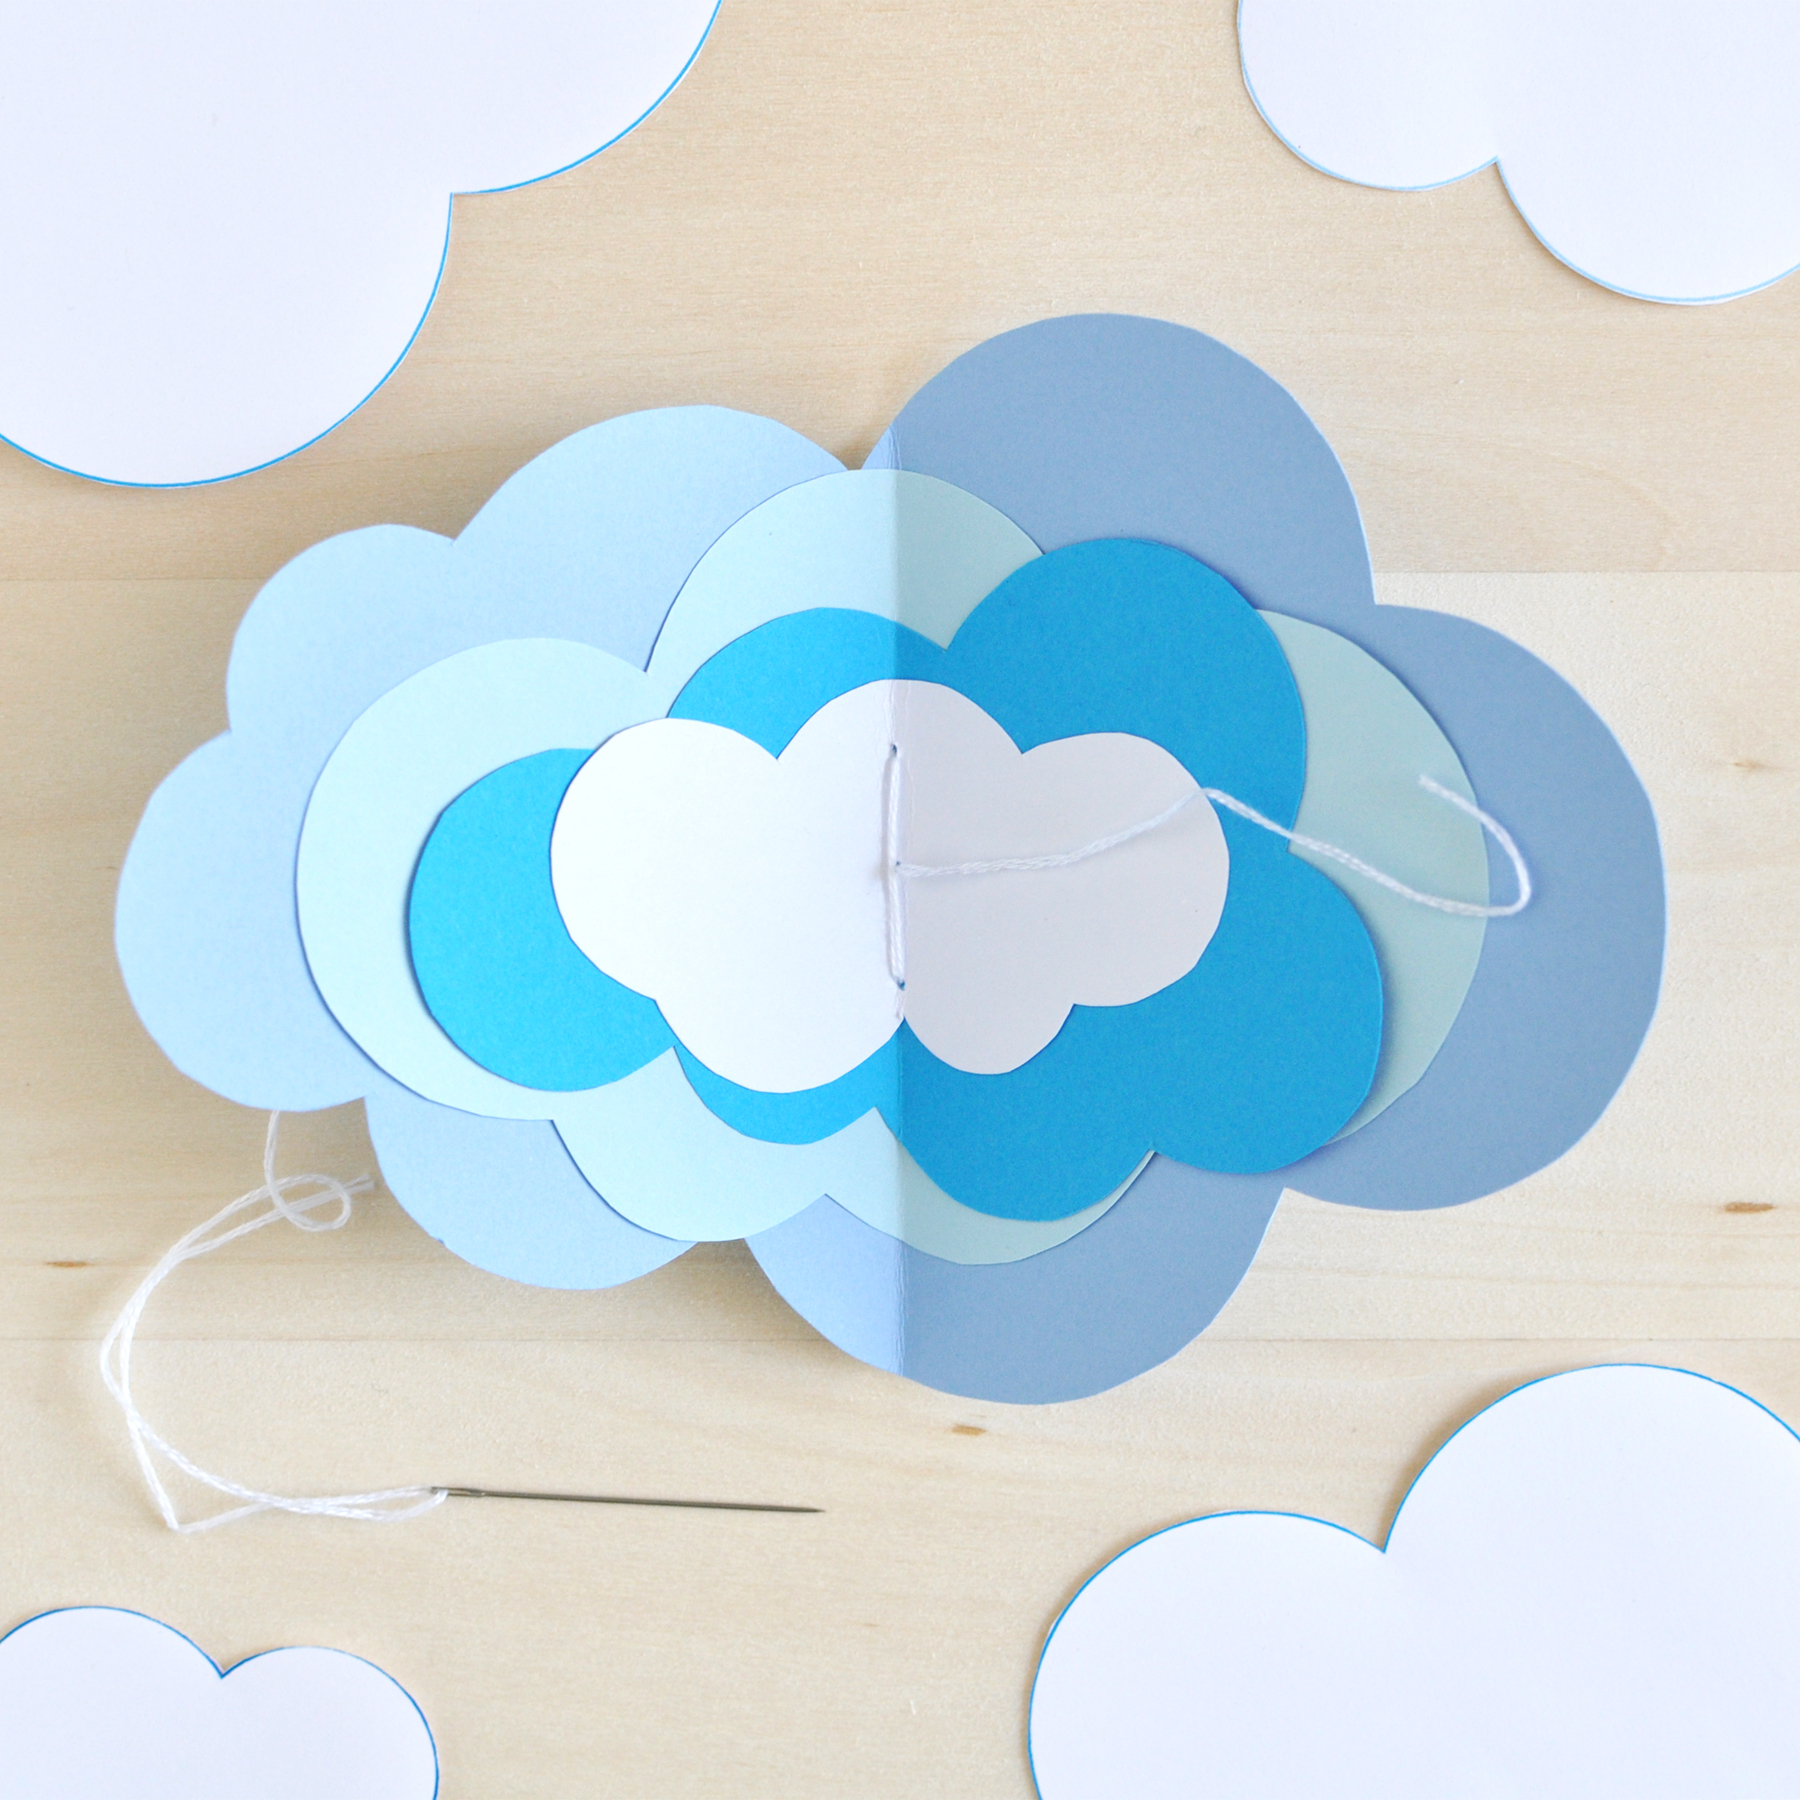

Separate your needle from the thread and tie a knot in your thread on top of the long stitch in your journal’s binding. Then tie a lovely little bow and snip the ends of the thread.


That’s it! You’re finished!
I hope your time spent in the clouds while making this little journal inspires all sorts of new sky’s-the-limit adventures.
As always, best wishes and happy journaling!
